بِسْمِ ٱللَّٰهِ ٱلرَّحْمَٰنِ ٱلرَّحِيمِ
This guide walks you through setting up and using Classrooms in QuranPortal. You'll learn how to create classes, assign teachers, organize students, and use the filtered teacher dashboard to focus on your cohort.
What Are Classrooms?
Classrooms let you organize students into groups. Each student belongs to exactly one class, and each class can have multiple co-teachers. Teachers only see students from their assigned classes on their dashboard.
In a Quran program, a class is more than a roster. It can represent a Hifdh group, a Qaidah section, a reading circle, a weekend maktab cohort, or a revision group that shares the same teacher schedule. Keeping those groups separate helps teachers grade the right assignments, review the right mistakes, and follow up with the right parents without searching through every student in the account.
This is useful when you have:
- Multiple teachers who need to share responsibility for a group of students
- Different programs (Morning Hifdh, Weekend Tajweed, etc.) that need separation
- A growing madrasah where teachers shouldn't see every student
Step 1: Create a Class
Only admins can create classes. Here's how:
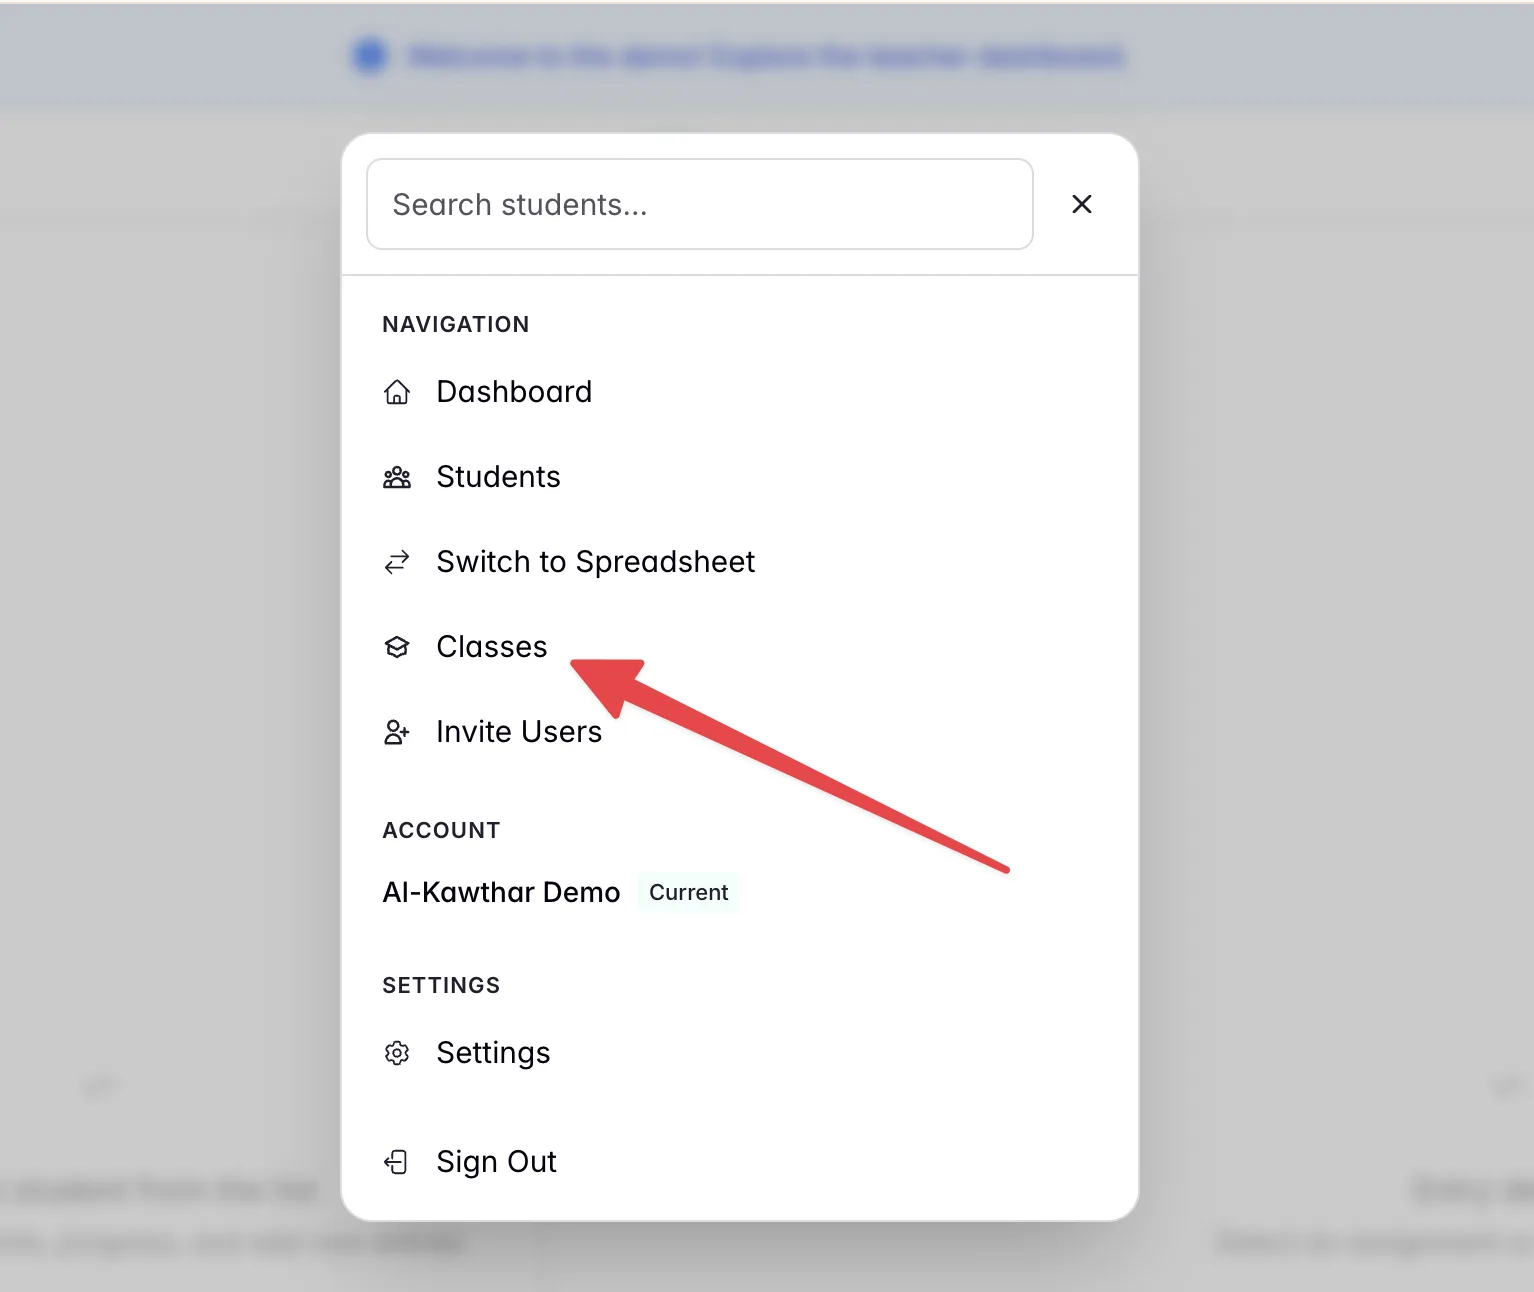
- Click Classes in the navigation menu
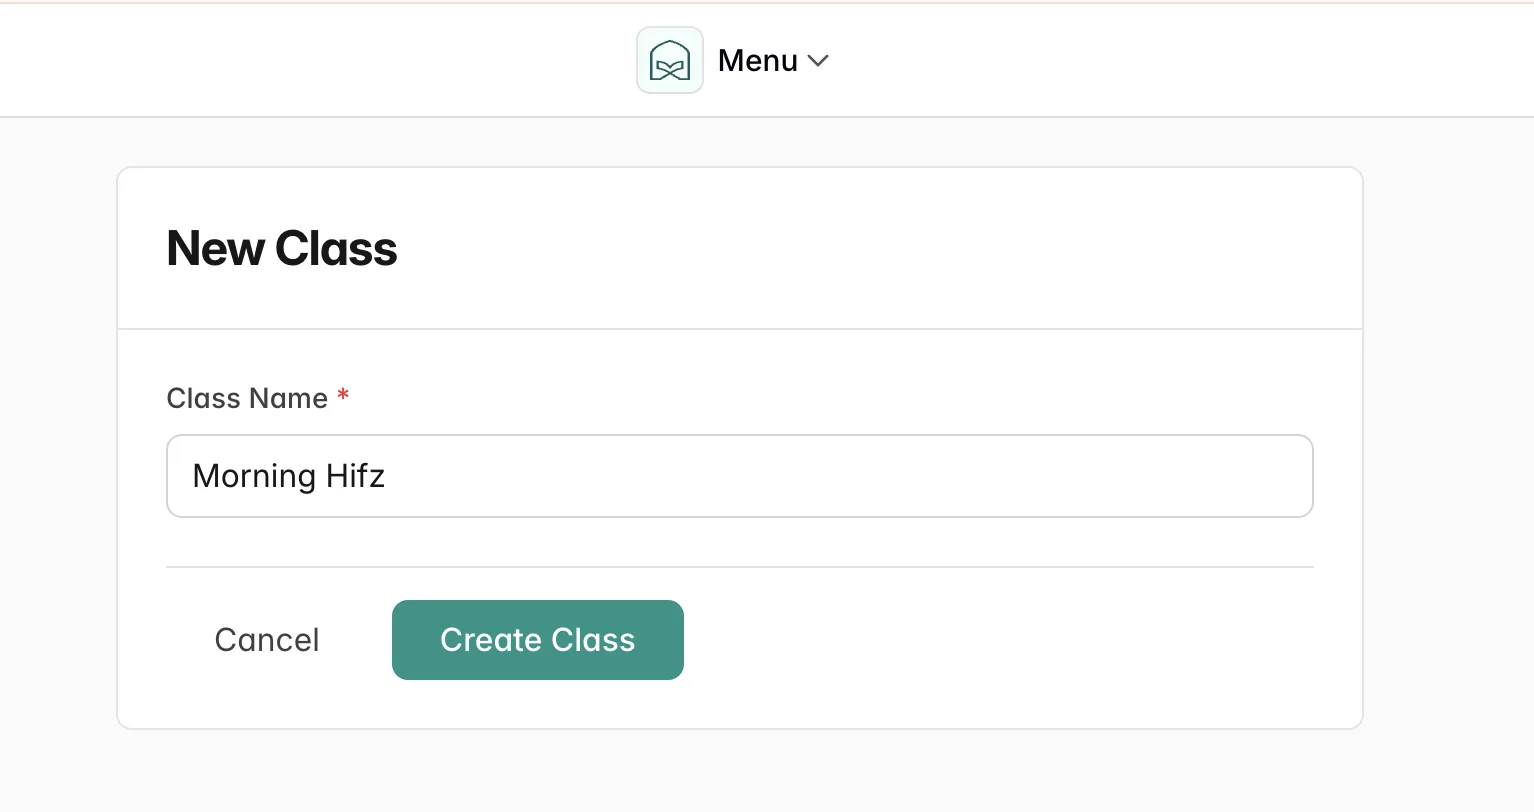
- Click the New Class button
- Enter a name for the class (e.g., "Morning Hifdh", "Beginners", "Advanced Revision")
- Click Create Class
By default, all existing teachers are automatically added to new classes. You can adjust this in the next step.
Step 2: Assign Teachers to a Class
After creating a class, you'll want to control which teachers have access:
- From the Classes list, click Edit on the class you want to modify
- In the Teachers section, check or uncheck teachers to add or remove them
- Click Update Class to save your changes
All assigned teachers have equal access. They can view all students in the class, create assignments, and grade work. The system tracks which teacher created and graded each assignment.
Step 3: Add Students to a Class
Every student must belong to a class. There are two ways to assign students:
When Creating a New Student
- Go to Students and click New Student
- Fill in the student details
- Select a class from the Class dropdown
- Click Create Student
Bulk Importing Students
When using the bulk import feature:
- Go to Students and click Import Students
- Select the target class from the dropdown at the top
- Upload your CSV file or paste student data
- All imported students will be added to the selected class
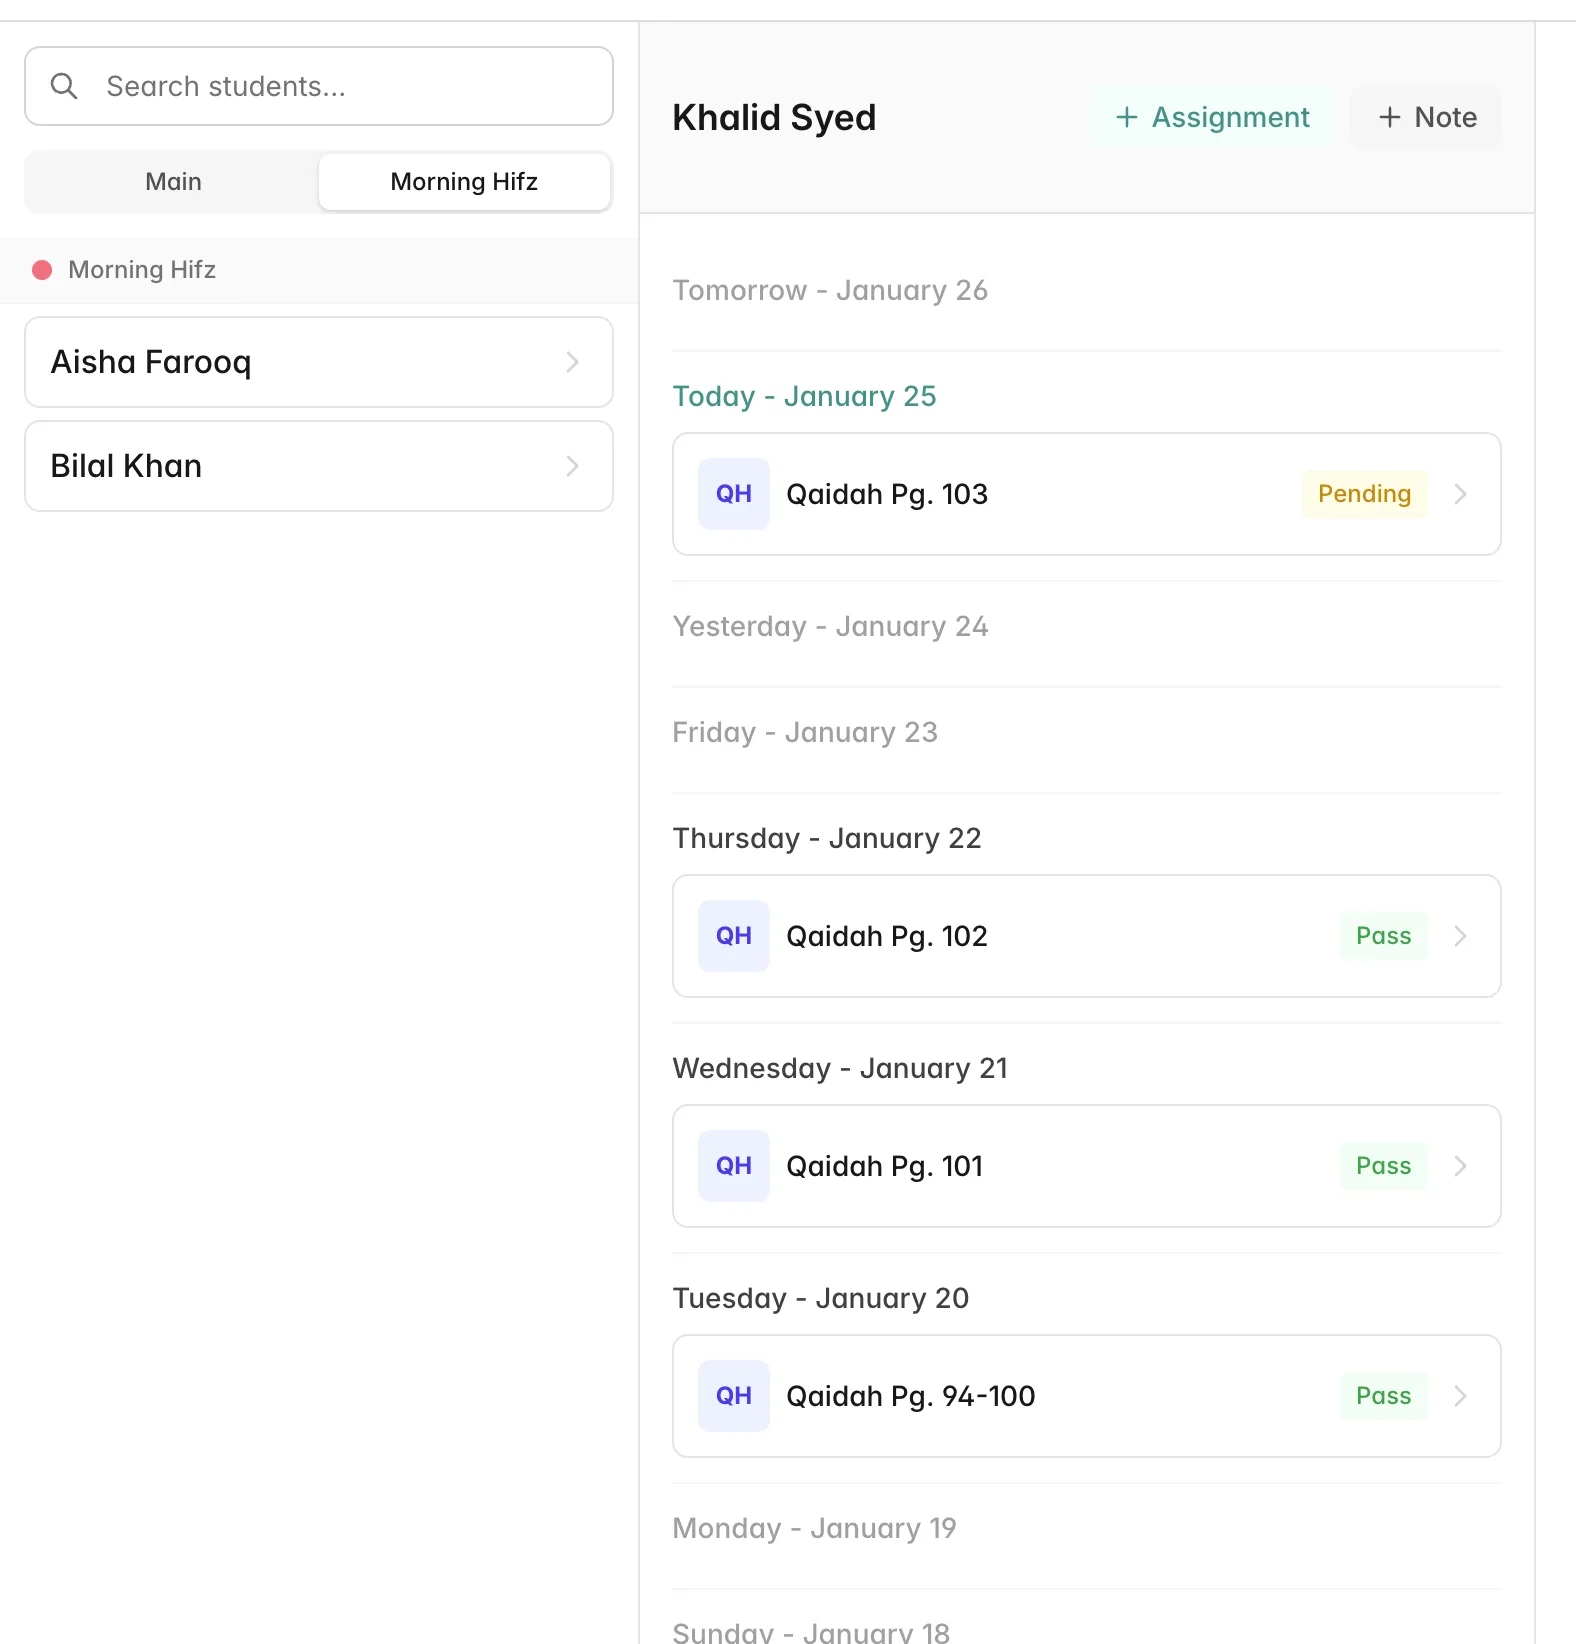
Step 4: Use the Teacher Dashboard
Once classes are set up, teachers will see a filtered view of their students:
- Go to the Dashboard
- You'll see tabs at the top for each class you're assigned to
- Click a tab to view only students in that class
- The student list, assignments, and statistics update to show just that cohort
If you're assigned to only one class, you won't see tabs—the dashboard shows your students directly.
Step 5: Transfer Students Between Classes
Students can be moved to a different class at any time. All their assignments, Personal Mushaf progress, and mistake history are preserved.
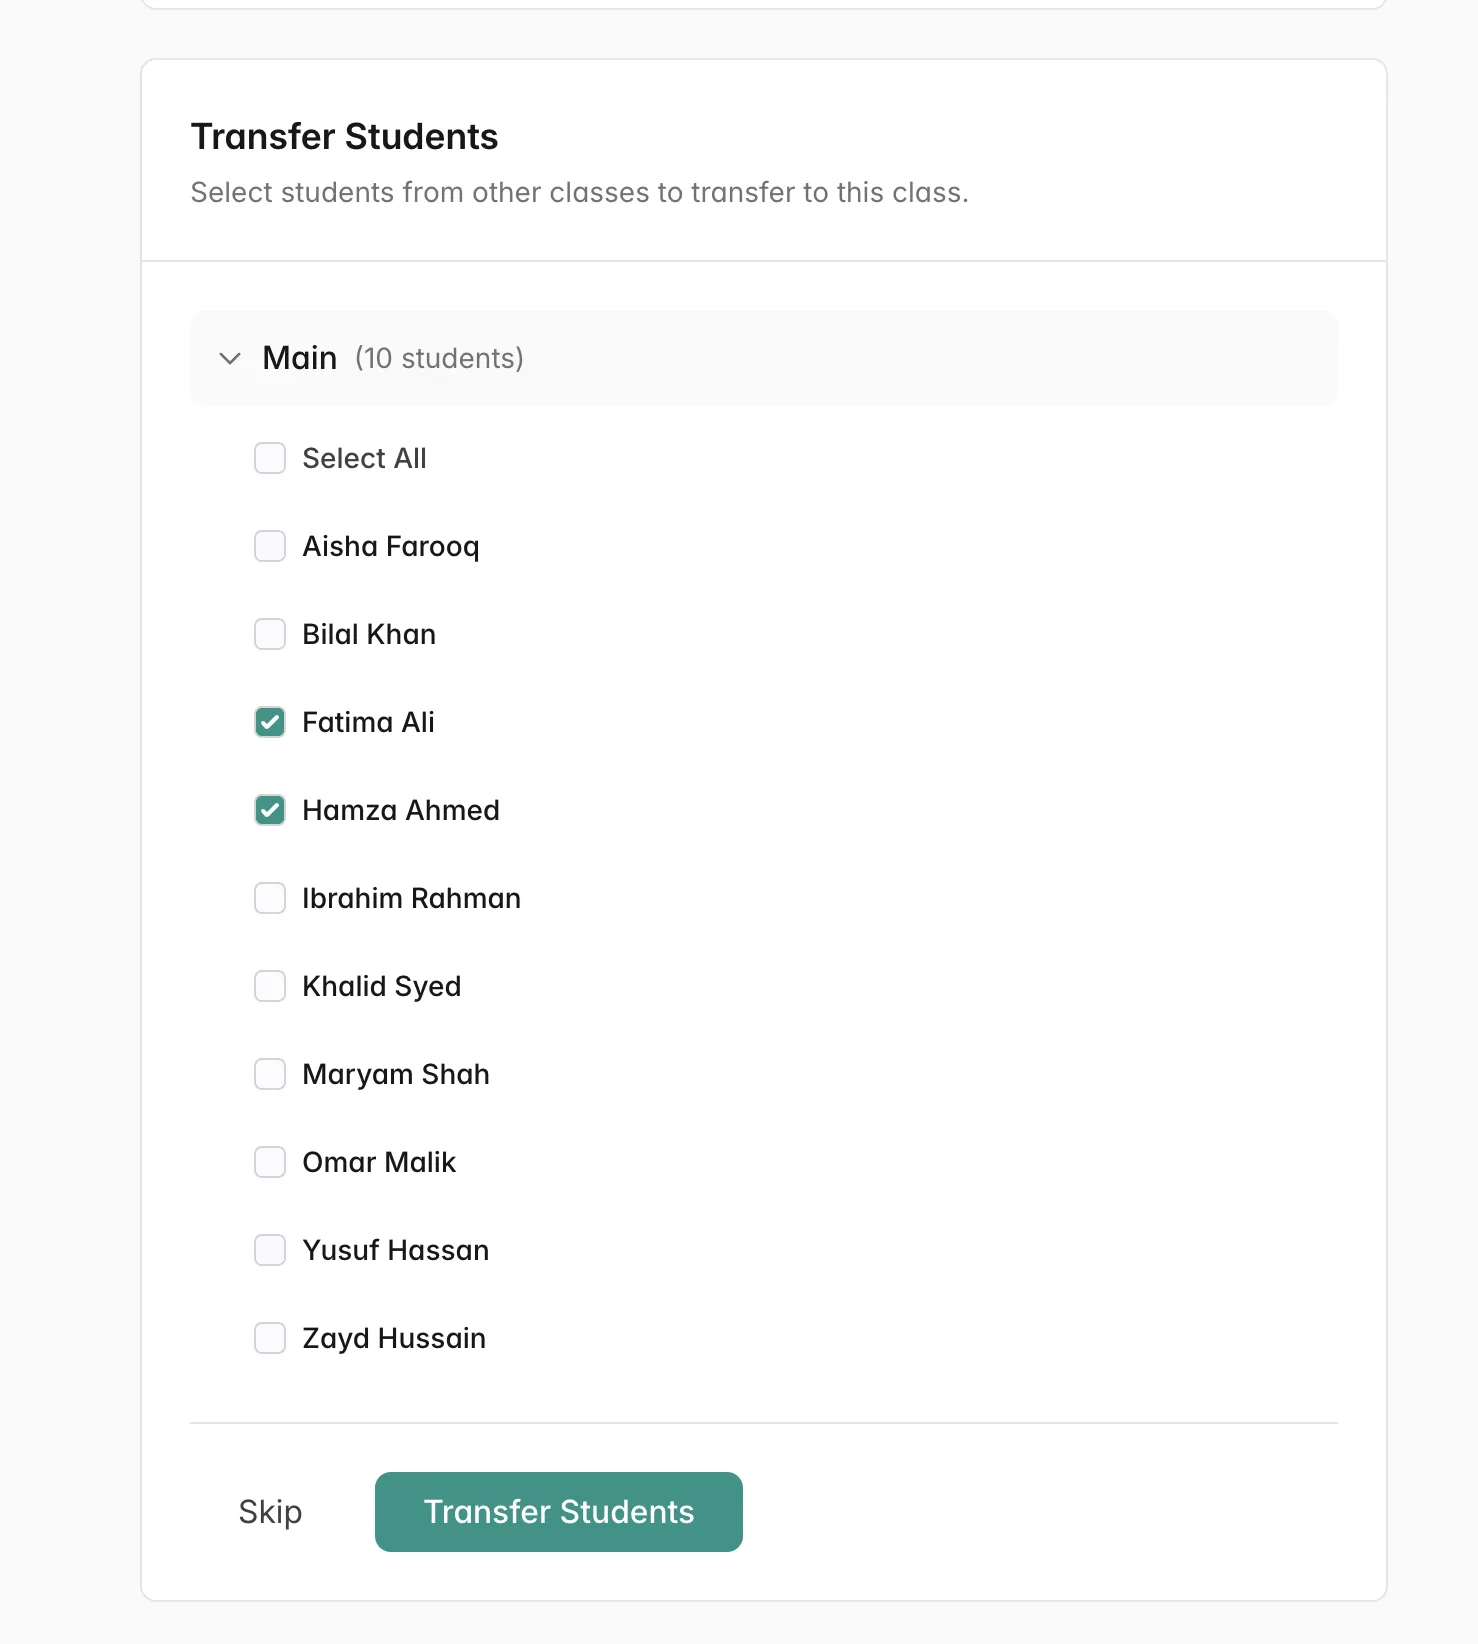
- Go to Classes and click Edit on the destination class
- In the Transfer Students section, you'll see students from other classes
- Check the students you want to move into this class
- Click Transfer Students
The selected students will now appear on the dashboards of teachers assigned to the new class. Teachers from the old class will no longer see them.
Tips and Best Practices
Naming Classes
Use clear, descriptive names that teachers will recognize:
- Good: "Morning Hifdh", "Weekend Beginners", "Sister Aisha's Group"
- Avoid: "Class 1", "Group A" (too generic)
Co-Teaching
When multiple teachers share a class:
- All teachers can grade any student's assignments
- The system records who created and graded each assignment
- Use this for substitute coverage or collaborative teaching
Admin View
Admins can see all students across all classes. Use the class filter dropdown on the Students page to view a specific class, or view all students at once.
Get Started
Ready to organize your madrasah? Head to the Classes section in your admin menu to create your first class.
New accounts automatically start with a "Main" class containing all teachers and students. Rename it or create additional classes as needed.
Questions? Email jibran@quranportal.io.